A Beginner's Guide to Stereoscopic Photography on a Smartphone: Pitfalls
Stereoscopic photography is possible with very simple tools: a viewer and a camera. In this post we’ll take a look at common mistakes beginners make, how to spot them, and how to fix these problems, so your stereo images look great.
Let’s briefly recap how stereoscopy works: the eye receives simultaneously two images taken from slightly different angles, and because of that the brain is able to reconstruct depth. This means that if we only look with only one eye or, hypothetically, move the eyes closer and closer together until they are effectively a single eye, any perspective disappears, as the brain cannot infer much about the third dimension that is supposed to pop out from the two-dimensional image on each retina.
Perspective is also relative: it’s only in relation to other objects that faraway objects seem, well, so far away. If you only look at distant objects, say, mountains, you do not get a clear sense of perspective: everything on the horizon looks equally far away. That’s because the difference between the left and right eye’s images is too small to helpful in determining depth. This is due to what known as parallax: objects closer to your position appear to move more in relation to your motion, or, in the case of a stationary observer, when you alternate between looking with a single eye. No parallax means no depth.
I remember the first time I walked through downtown Manhattan and I kept looking up at the skyscrapers thinking, ‘What’s so special about the height of these buildings?’ Because almost all buildings in Manhattan are tall, none looked particularly tall by comparison. It was only until I climbed up the Empire State and looked down, seeing tiny people and Matchbox-sized cars that I realized how high up I really was. The view across the Hudson also provided that much-needed information to put things into perspective.
Mistake #1: Lack of perspective
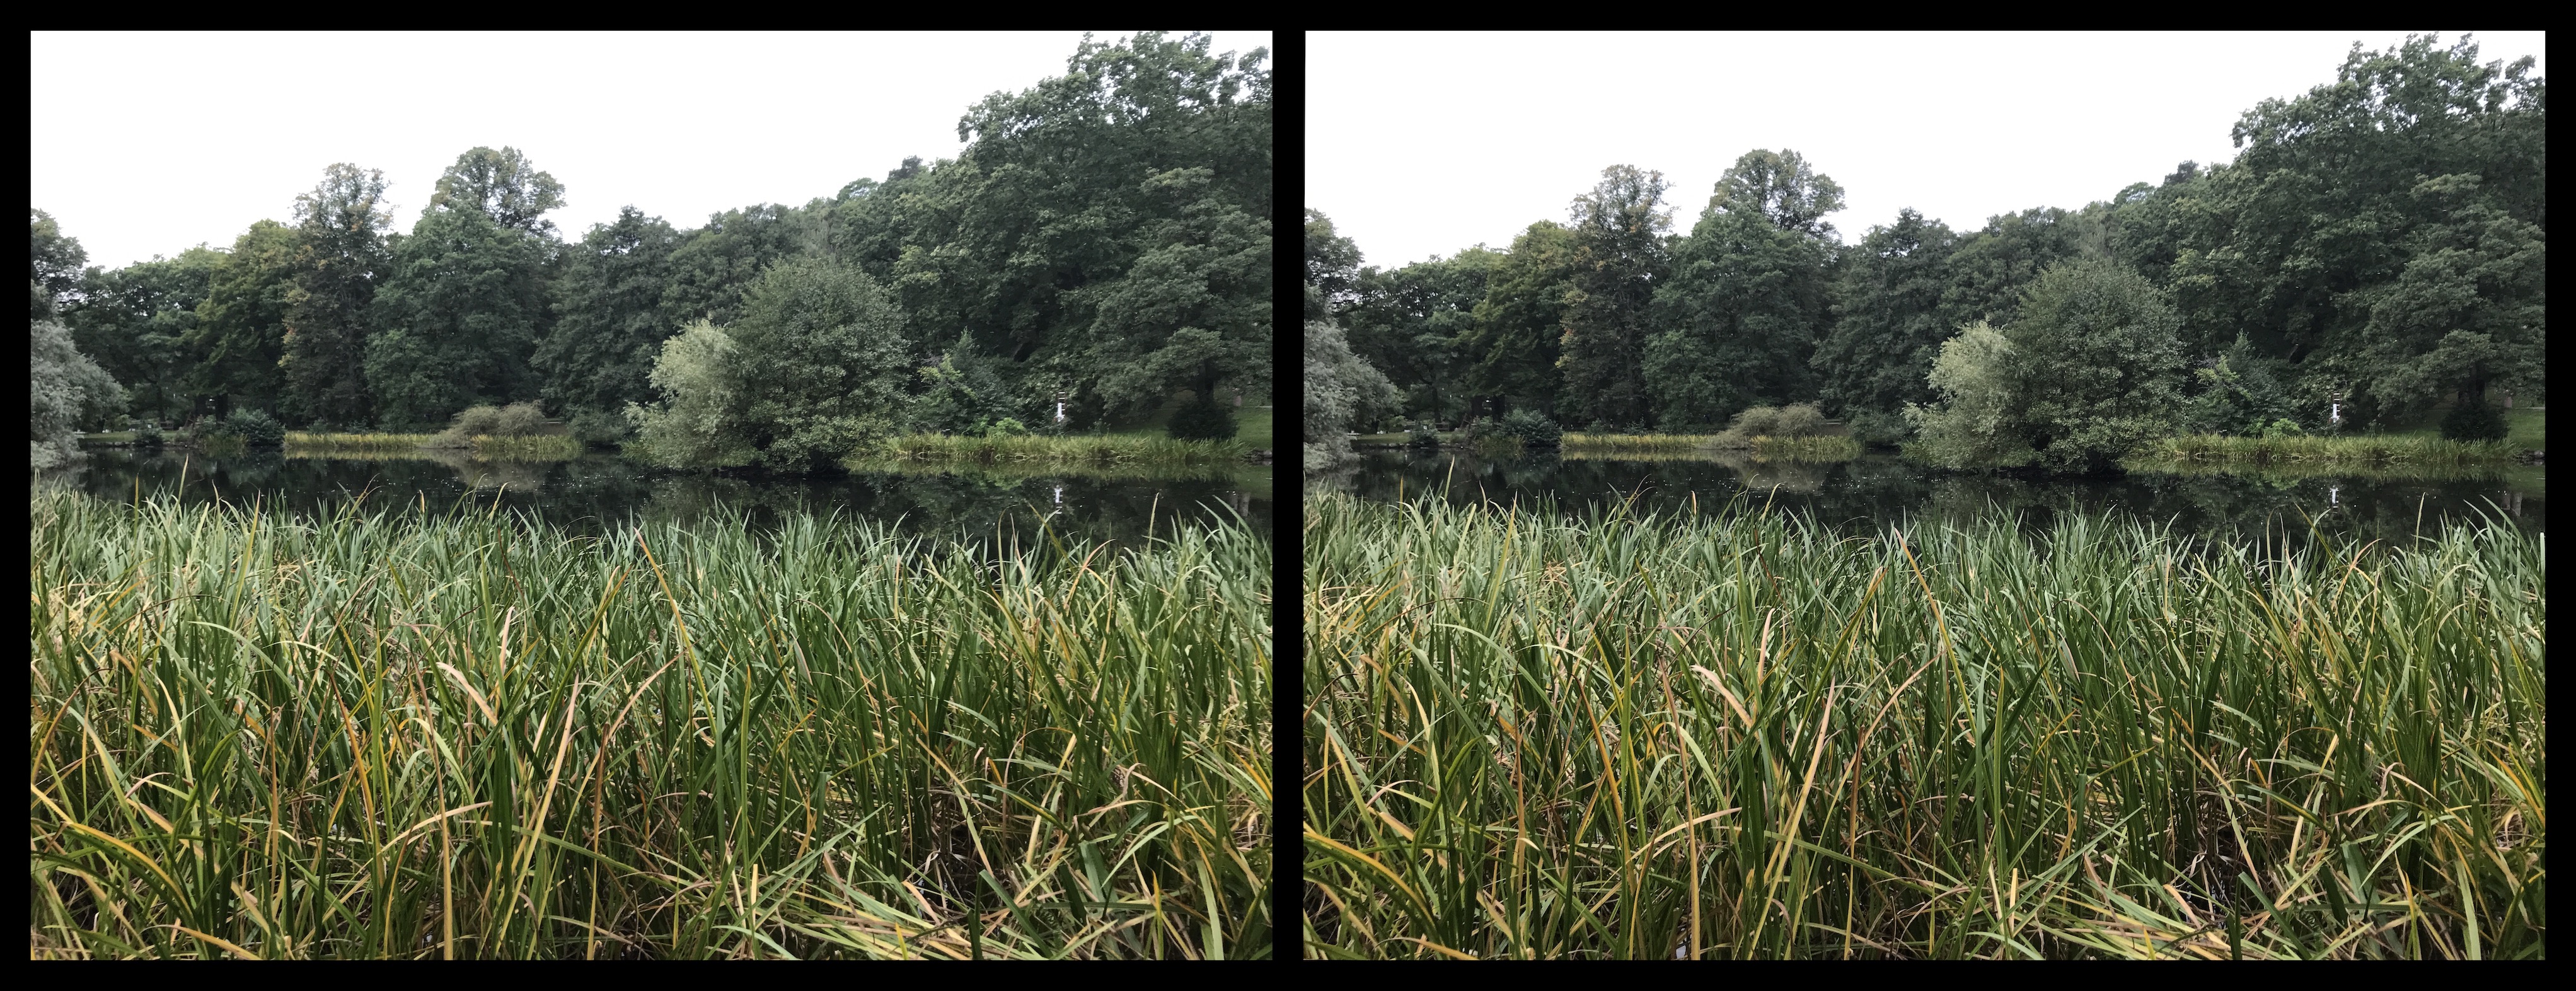
Perspective is relative: you need to have depth in the scenery to see in 3D. To most beginners, it may not obvious when you take a picture of a landscape with mostly distant objects, why it ends up looking flat when viewed through a stereoscope or on your phone with a special case, such as the Mopic Snap 3D, which uses eye-tracking software and lenses embedded in the case to recreate a three-dimensional image. You need to have something in front of something else to be able to see in three dimensions. Without a different angle, you just have a two-dimensional picture:

The deviation comes from i3DSteroid. It informs you of the difference between the left and right images. If the deviation is near zero, there is no depth information for your brain to process. What you see through a stereoscope is nothing but a two-dimensional picture, the same one as if you would look at a single image without a stereoscope.
The same is true if you take a picture of, say, an abstract painting in a museum: the painting itself has no real depth as it’s a two-dimensional slab of art on the wall. The best you can achieve is to see some perspective in the frame: you cannot create perspective with stereo imaging where there is none. That said, there is of course software that relies on monocular cues, which can ‘fake’ a third dimension from a single two-dimensional image, but it’s not the same as a real stereoscopic pair.
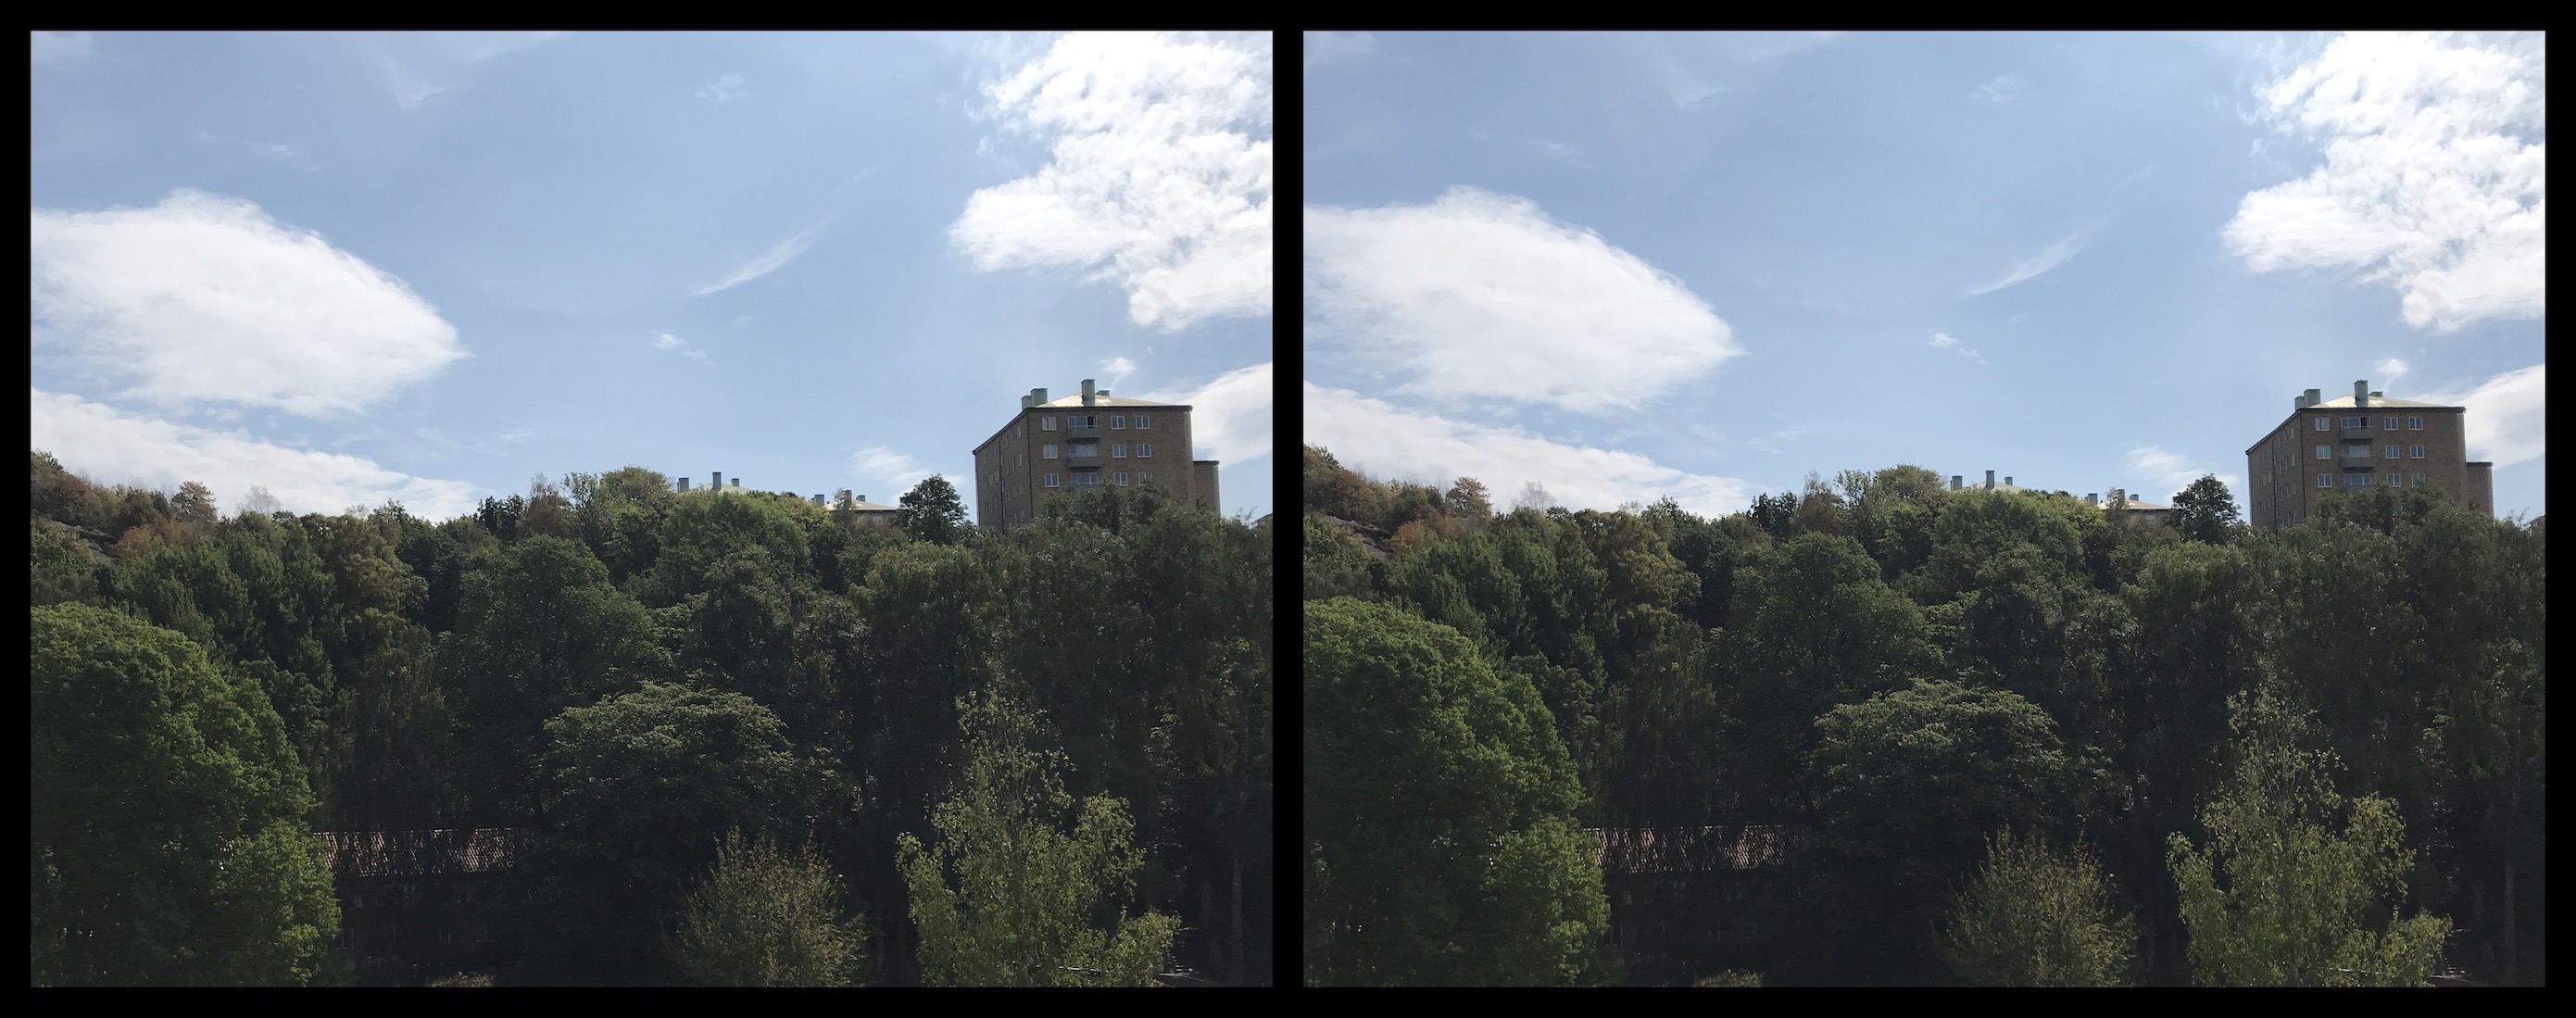
A picture with distant scenery and nearby shrubbery does show perspective when viewed through a stereoscope:
The reason is that there is something (nearby) in front of something else (farther away). Based on that, the brain can reconstruct the third dimension.
Mistake #2: Too small baseline
To mimic human vision you need both images to be taken roughly 50-75 mm apart. The closer the baseline, the less you are able to see perspective, unless you have a close-up. The same applies when (almost) everything is on the horizon:
Note that at 1.2% deviation, the brain can infer some depth, but not a lot.
Small-baseline stereos (i.e. hypostereos) allow you to see the environment as an insect would, so it’s ideal for close-ups and small objects. Hyperstereos are how giants would see the world around them, which means hyperstereos are great for mostly faraway and large objects (e.g. cityscapes). A large baseline is, however, not a miracle solution.
Mistake #3: Too large baseline
On the other end of the spectrum beginners may overcompensate by having a huge baseline. Here’s a close-up (from about 30 cm) with a baseline of 5 cm:

And here’s the same close-up but with a baseline of 1 cm:
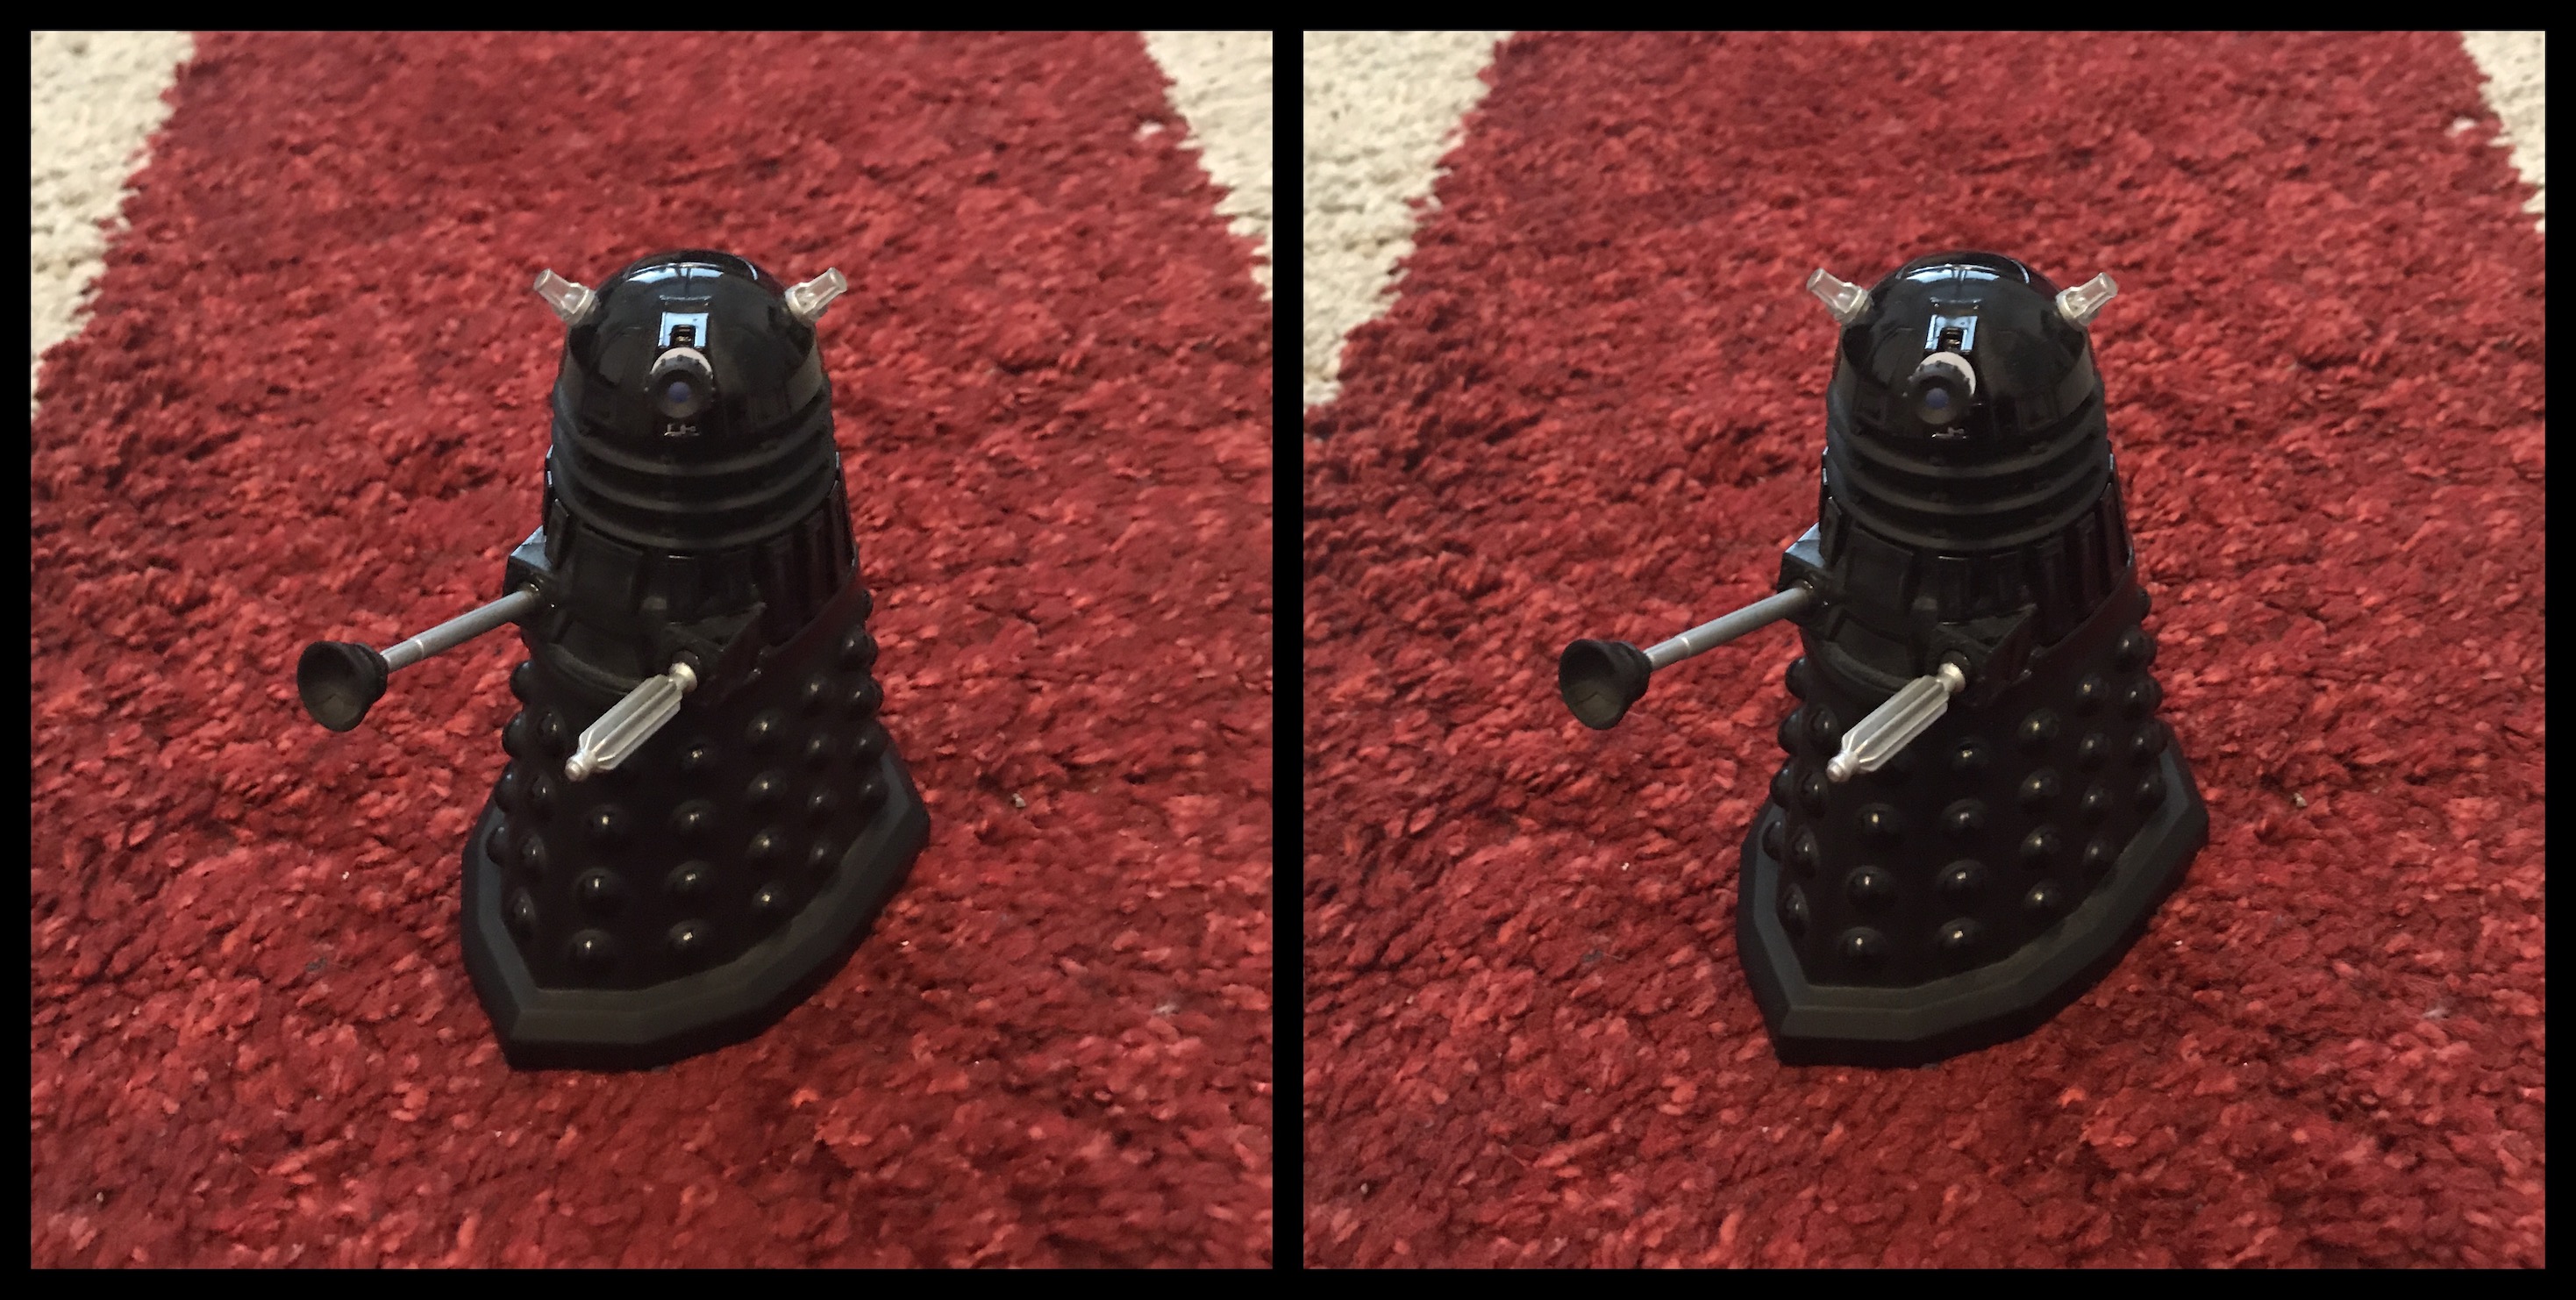
The reason the second image is fine is that the distance between the camera and the object matches the baseline.
So how do you determine the correct baseline? A common rule of thumb is the 1:30 rule: the baseline is equal to one thirtieth of the distance to the nearest object in the photograph. So, if the nearest object is 90 cm away, the baseline is 90 cm / 30 = 3 cm.
There are fancier methods of computing the baseline, but for beginners the 1:30 rule is good enough. The app Camera 3D Pro allows you to select the distance to the nearest object and it recomputes the baseline for you, which is why I think it’s a great app for beginners. All you need is eyeball the distance to the nearest object in the scene.
What about hyperstereo?
There are instances where a larger-than-human baseline makes sense. For instance, when you are looking at extremely distant objects (e.g. the Moon or a mountain range on the horizon) with very little foreground. If you want to capture the texture of, say, the surface of the Moon you have to take images very far apart. In fact, most stereo images of galaxies, moons, and planets are taken several minutes or even many days apart because the orbital motion of the Earth (or motion of any artificial satellite that’s used to shoot the picture from) offers a different angle. You can often see that by looking at background objects such as stars.
A trick to create hyperstereos from aircraft (or any fast-moving vehicle for that matter) is to take two pictures quickly after each other, for instance when you’re approaching the airport and have the entire city clearly in view from the window. Since the plane is moving at a high speed, taking pictures a second apart already translates into a large baseline. At a speed of 360 km/h, which is a pretty common approach speed for commercial jets, you’re travelling at 100 m/s. Pictures taken a second apart therefore have a baseline of 100 m. That means that the nearest object can be 100 m * 30 = 3,000 m away, thanks to the 1:30 rule. That’s great for views of an entire city or a beautiful cloudscape.
Here’s a hyperstereo of Hamburg (Germany) taken from the sky:

Mistake #3: Lining up the foreground
Close your right eye and look in front of you with your left. Now close your left eye and look with your right without changing your focal point. Are objects in your immediate vicinity stationary? No, they are not.
One common mistake is to use the transparent overlay of the left image to align with the right image as you take it. Since objects nearer to you are typically larger and therefore easier to align, beginners often line up the foreground. The transparent layer in some apps is there for you to ensure the focal point of the scene is visible in both shots, not to align the foreground. After all, such an alignment messes with parallax: some objects nearer to the observer move more in relation to others in the background.
What happens when you do align the foreground? You typically end up with a flat foreground object. For instance, the sphere in the next picture has been used to match the transparent overlays:
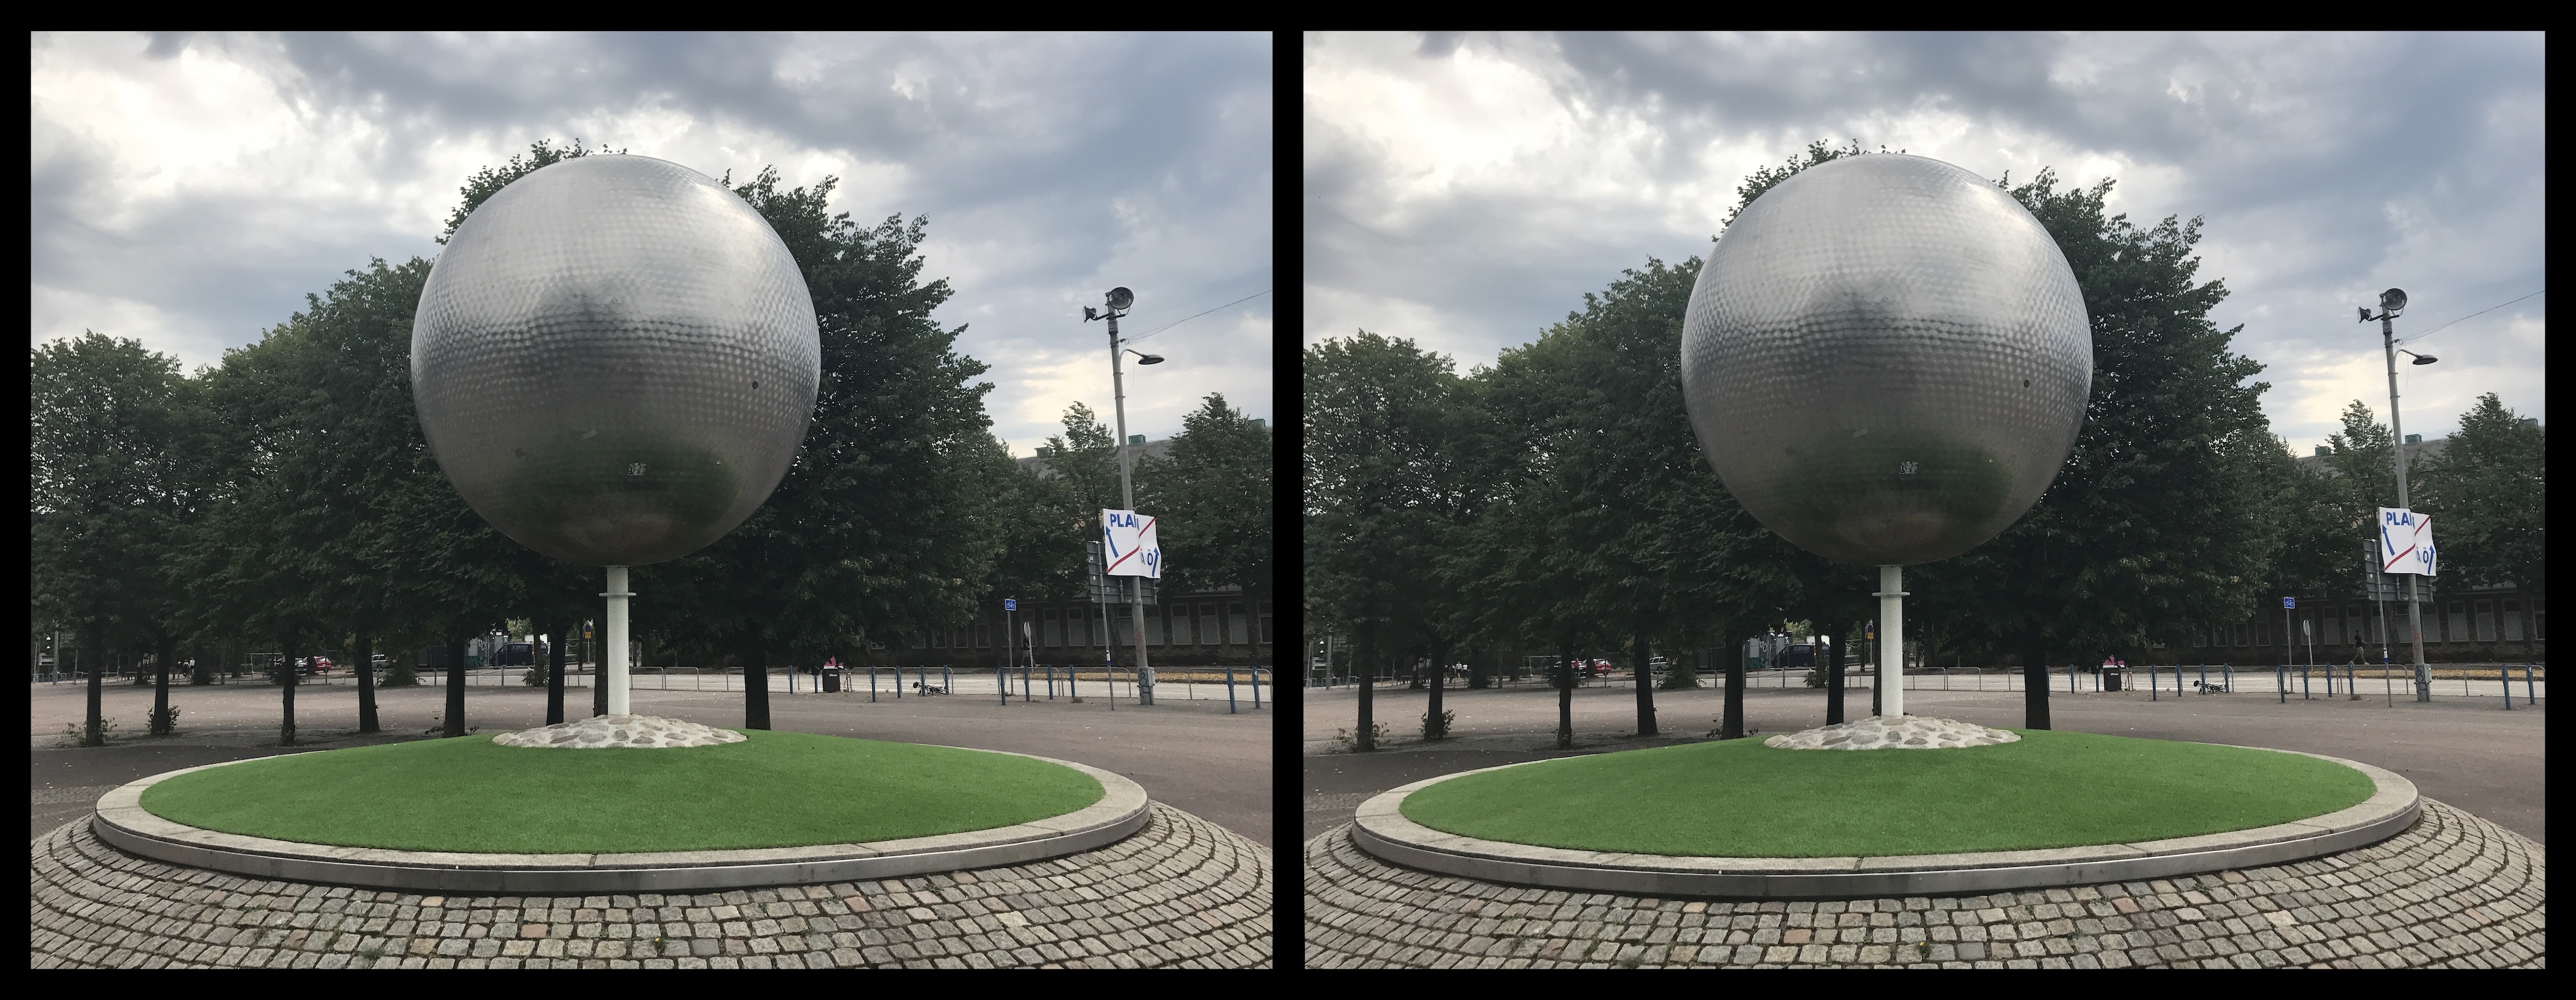
There is some depth in the stereoscopic image, but the sphere itself does not really pop out from the picture, even though there are dents that ought become more visible through a stereoscope.
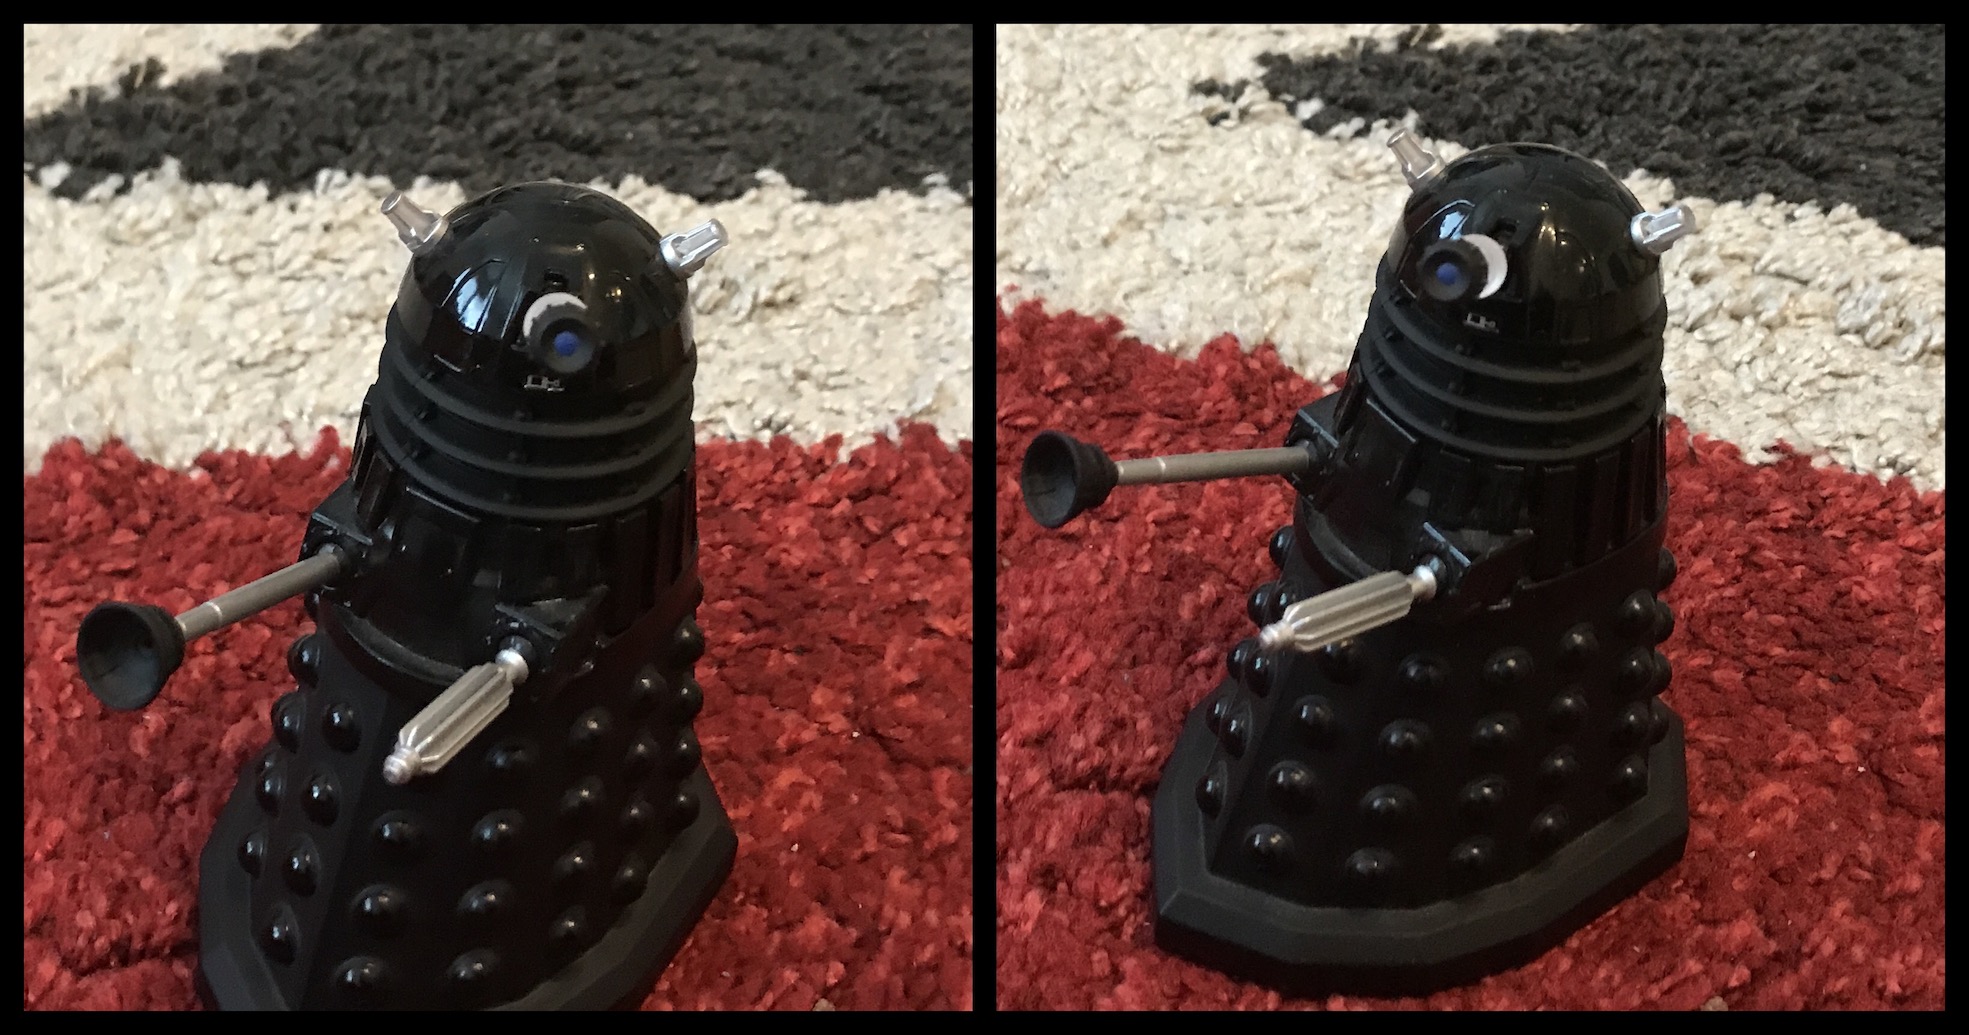
Mistake #4: Motion and ghosts
When you take a single image, fast motion can translate into blurriness. With a shorter exposure time (a.k.a. shutter speed) you can mitigate that and essentially freeze motion. For stereo pairs that are shot sequentially that’s not always going to work. The reason is that the motion occurs while the shutter is open and in-between shots. Even for relatively slow motion, it’s the latter that is problematic for sequential stereos. You can of course use burst mode while moving the camera and maintaining its orientation.
The effect of motion between the left and right images is visible as semi-transparent entities:

The people on the tram who moved in the time between taking the left and the right images, end up looking like ghosts. That’s because the eyes do not see the same scene from different angles: they see partially different images from different angles. Note that the effect is not as jarring when it happens in the background though:
Mistake #5: Attitude adjustments
The attitude is the relative orientation of a camera. When you hold your smartphone in landscape mode, which is common for stereoscopic photography, you typically hold it level and straight at the scene you want to snap a picture of. As you shimmy the baseline distance to the right, you typically keep the phone locked on an object with zero parallax (i.e. something in the background), especially for hyperstereos. This means that you rotate the camera ever so slightly around the axis that goes through its middle from one long edge to the other. This is the yaw angle.
With some basic geometry you can figure out what an acceptable yaw angle is. If a faraway object is at a distance d, the baseline is b, and you’re holding the camera straight towards the distant object for both the left and right shots, the angle between your camera and the line that connects is 90° - α. The angle α is the angle in the isosceles triangle between apex (i.e. object in the background) and the base that’s made up of the two vertices where you stand for the left and right photographs. We can easily compute the angle:
\[\tan{\alpha} = \frac{d}{b/2}=2\frac{d}{b}\]Why half the baseline? Because, the right triangle that we need to compute α slices the base neatly in half, straight down from the apex.
In most cases d is going to be many times larger than b, so that
\[\alpha = \lim_{d/b\to\infty}{\arctan{\left( 2\frac{d}{b}\right)}} = \frac{\pi}{2}\]This corresponds to 90°, which makes sense: the yaw is mostly going to change marginally as you pivot the baseline around the zero-parallax object in the background.
Let’s do a calculation for a baseline of 5 cm and a distance of 100 m. Plugging in these numbers, we obtain an angle of approximately 1.57 radians, or 89.99°. Since you move the camera from one edge of the isosceles triangle to the next (along the base), the total yaw rotation is twice that number: 0.02°. That’s pretty small indeed.
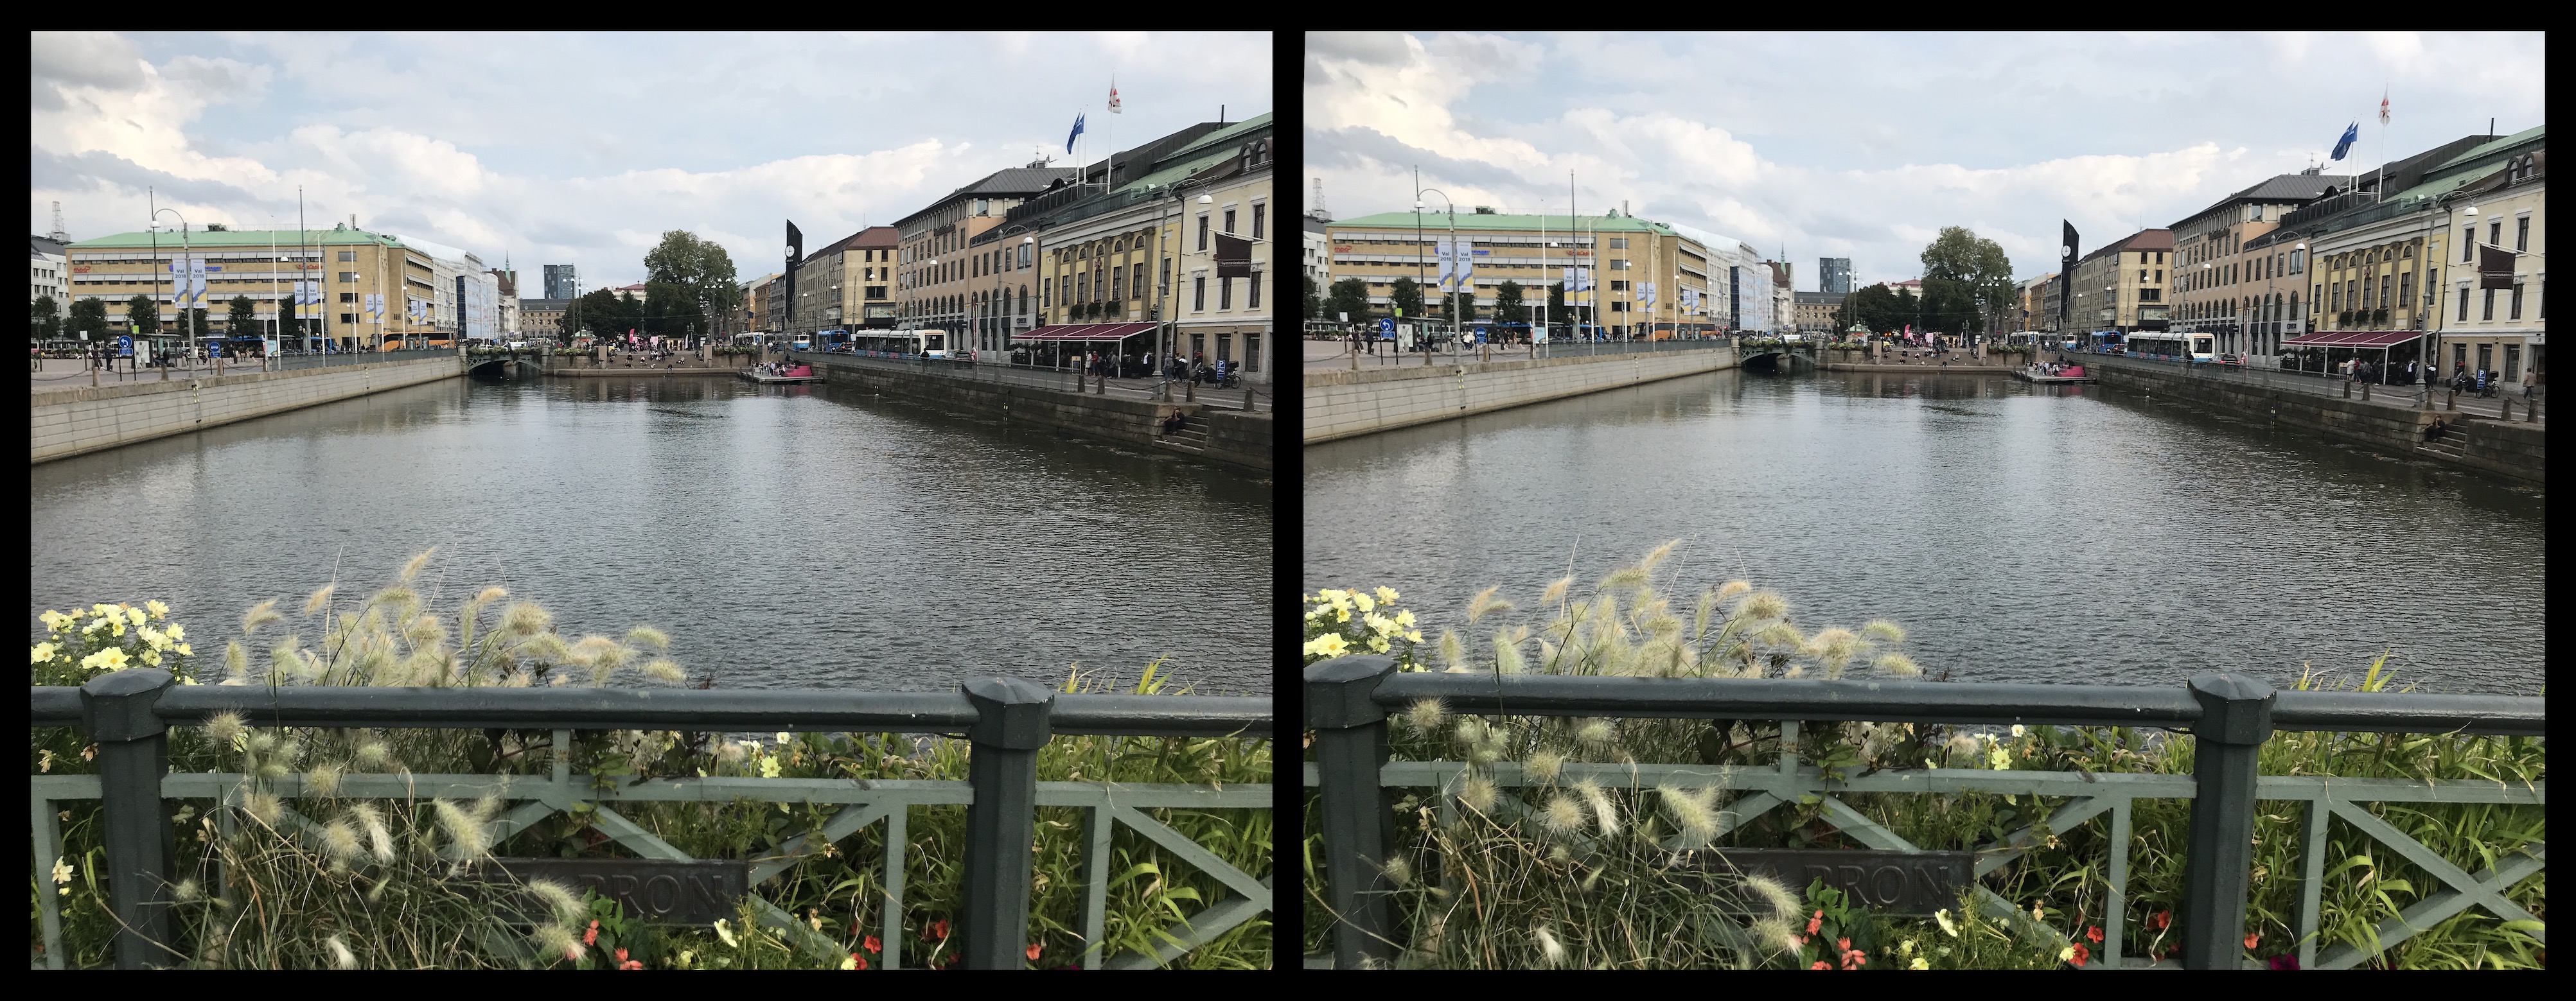
The problem of yaw adjustments becomes more apparent with closeups. With a too large baseline, it feels natural to keep the focus on the object in the frame as you move from the left to the right. This means that we artificially increase the yaw, which can happens when trying to align the foreground. The result is the following awkward image:
With the correct (shorter) baseline, the urge to increase the yaw is less pronounced for closeups, which is why it’s important to get the baseline right.
A change in the pitch is when you rotate the camera towards the ground or sky (through the axis that runs through the middle from one short edge to the other). It’s probably clear why that’s a bad idea: if the left image contains your feet and the right image contains the clouds, you’re not looking at the same image at all. When you alter the roll angle you’re tilting the phone from landscape towards portrait mode. However, pitch and roll faults are less likely with a smartphones as you can see what you’re taking a picture of.
Summary
These are five common mistakes beginners make. In fact, these are five mistakes this particular beginner made. Stereoscopic photography with smartphones is not that difficult if you remember to use the correct baseline and make sure the scene actually has any discernible perspective. If you ensure that, you’re good to snap some nice 3D pictures with your phone.
In the next post I shall take a look at the Kúla Bebe, a mirror attachment for smartphones that has a fixed baseline, so it’s not ideal for hypo- and hyperstereos. It does comes with the advantage that the left and right images are taken simultaneously without having to create a synchronized rig with two cameras! That way, you can take 3D pictures of objects in motion as well as videos.